


Easy DIY Halloween Decorations
It’s freakin’ bats! I love Halloween! Is there anything better than watching Hocus Pocus while putting out pumpkins and skeletons? This is why Halloween is one of my favorite holidays to decorate for! But what happens when you run out of ideas, or the decorations you have feel boring? It can get expensive to replace decorations every year, but don’t you worry; we’ve got your back! Below, you will find a couple of easy DIY projects that will give your home the spooky look you’re searching for this Halloween season!
Supplies:
- 1 pack of wooden balls (with a hole through and through)
- Waxed thread or twine
- 1 Black foam sheet
- 1 larger needle for twine
- Scissors or an X-Acto knife
- Dark branches from your yard, or purchased twigs
- Your favorite Halloween-themed floral vase
- A small bat stencil or drawing

Bat Garland
Step 1: Trace + cut bats
Once you have a stencil drawn out for the size and shape of the bat you want, it’s time to start making them! This is where the foam and X-Acto knife come into play. Start by placing your stencil over top of the black foam sheet. Make sure you have something underneath the sheet that can be cut, as the knife will go through the foam. Then you will trace your stencil with the X-Acto knife until it is fully traced, and then you can pop the bat shape out of the sheet. Follow this process until you have used up the entire sheet or until you have enough bats for the size of decoration you need.

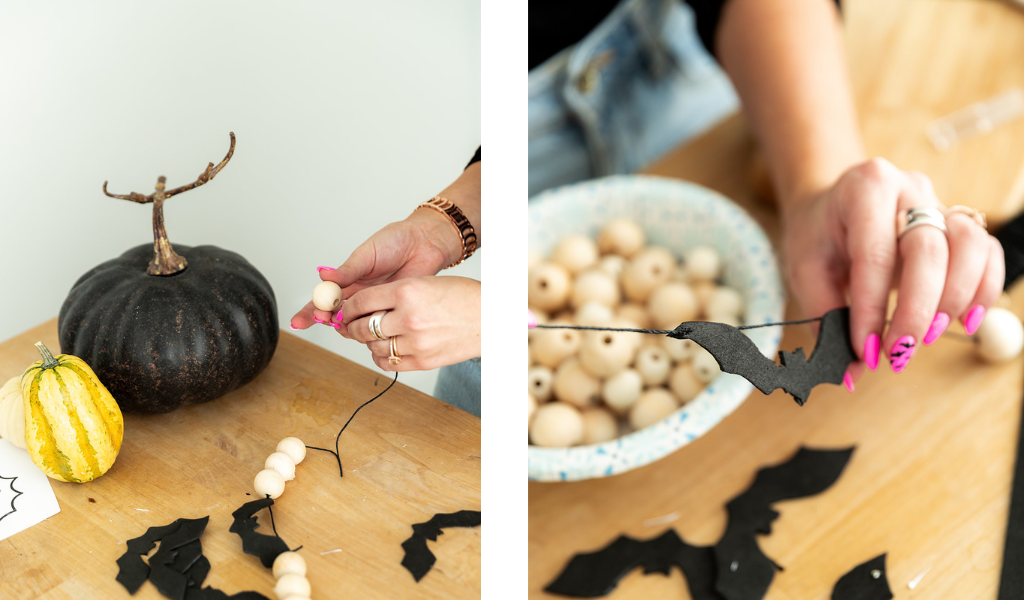
Step 2: Poke holes + start stringing
This is the step where you start seeing the garland come together! Once the bats are all cut out, poke tiny holes in the edges of each wing. This will allow the bats to properly hang on the string. From there, you will thread the needle and start stringing the wooden balls + bats. You can do whatever pattern you prefer, but a good rule of thumb is 4-5 balls consecutively strung, separated by one bat, and then 4-5 balls after the bat. Once you have your garland as long as you need it to be, leave a few inches of space on each end for hanging.
Step 3: Hang + show off
Now that your garland is complete, it’s time to find a spot on your wall, shelf, or mantle to hang it! Tie each end into a small knot that can be placed around a nail or screw. From there, you can hang the garland up! Once it's hung securely, the balls may move + squish the bats a bit, but don’t worry! Just push the balls back out, and stretch out the bats to stay in place. If this doesn’t work, you can also place a small bead of glue around the hole where the string goes through the batwing. This will ensure it does not move!

Halloween Floral Arrangement
Step 1: Trace + cut bats
You will follow this step the same way you did in the first step to the bat garland. However, if you have extra bats cut out that were not in the garland, you can skip this step! Start by placing the stencil you used for the bat garland over top of the black foam sheet. Make sure you have something underneath the sheet that can be cut, as the knife will go through the foam. Then you will trace your stencil with the X-Acto knife until it is fully traced, and then you can pop the bat shape out of the sheet. Follow this process until you have 8-10 bats cut out.

Step 2: Arrange + place bats
In this step, you will set up your branches/twigs in your favorite Halloween-themed vase. You can arrange these stems however you like, just ensure they fan out toward the top of the arrangement! From there, you will place the cut-out bats in different areas of the arrangement. Because they are stiff branches, they should hold the bats in place wherever you place them, but if they don’t you can secure them to a branch with a small bead of hot glue. Once the bats have been evenly dispersed, set up your arrangement in your favorite area to show off to friends and family!


